


If you ever wanted a purse that was just "All You", Saddle Up! You're in for a long ride!
Here is a very basic design for the beginner Bag Ho! You can do this in any dimension that you like. Because I just wanted to throw one together for post purposes, I hit my stash and pulled out a few fat quarters.
To start, I measured my two outer fabric pieces. You can use any measurement that suits your needs.
I swear by the rotary cutter for accuracy!
Cut 2 pieces. These are 10" x 8.5"

To add a little stability, I cut 2 identical sized pieces of fusible fleece and ironed it to the back sides. Make sure they are identical or you will have a mess on your iron...trust me.
Helpful Hints: If you 'gum up' your iron, rather than buying iron cleaners, try this: heat your iron up, lay a terry clothe towel on your ironing board. Run a small line of table salt in the center of the towel and then iron over it with a bit of pressure. After a few swipes, your iron will be brand spankin' new!
Also, if you want to avoid this altogether, you can lay a piece of muslin over your fabric and then iron over it and peel the muslin up if necessary.
Layer the 2 pieces right sides together (cute side to cute side).
I used 1/4" seam allowance throughout.
Pin if desired and then sew down the side, across the bottom and up the other side. Note: If you don't want to 'turn' the corner, just sew right off the edge, needle up, pull out the material a bit and reposition with the same seam allowance and continue sewing.

 |
| Note 1/2" height difference |
Fold the piece in half, wrong sides together, and press. I like to use an oak block to set the fold line crisply.
 |
| Oak block used for achieving a nice crisp line. |
Repeat if you would like to add a pocket to the other side of the lining.
Draw a faint line where you would like your pocket dividers to go. I just found the half-way mark. But you could do as many as you like for say a pen/pencil spot etc.
 |
| Pocket pinned to lining. If you look closely, you can see my dividing line mark. |
Then sew along the drawn line.
When you reach the top of the pocket, reinforce with a few reverse stitches as this will be a stress point.
Repeat on the other side of lining if you are adding pockets to both sides.
 |
| Note extra stitches at top of pocket. |
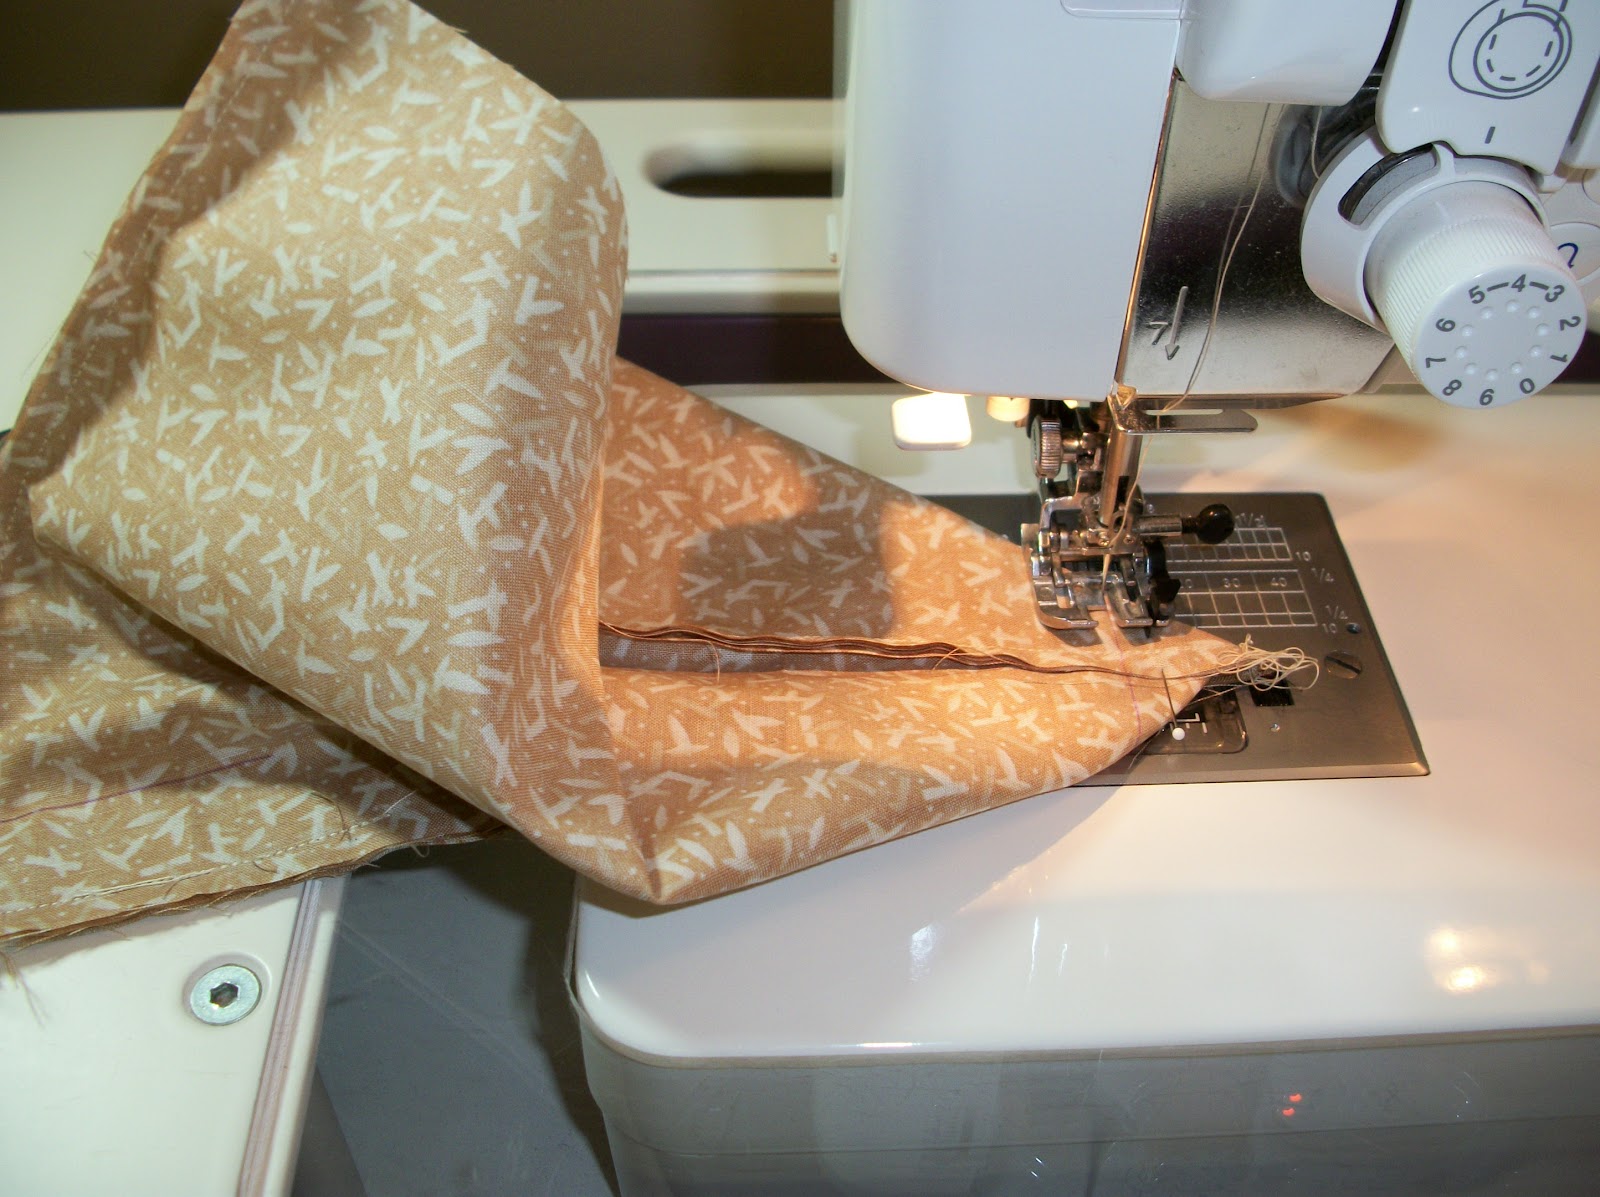
You are now ready to sew them together with one variation. You will NOT sew all the way across the bottom.
Instead, sew down the one side, begin sewing across the bottom, needle up and pull the fabric out also giving yourself enough thread (or cut and restart), then reposition the fabric with the same seam allowance and leave a gap of about 4" in this instance. Continue sewing across the bottom and up the other side. This 'gap' is left open so that the purse can later be turned inside out.
 |
| Gap left for Turning later. |
Things will start to get tricky from here out, so I will do my best!
Now you need to decide roughly how wide you want the base of the bag to be, taking into consideration seam allowances. Since I was working small scale here, I chose roughly a 2" finished base. I am never quite exact, mathematician I am not!
Lay your pieces flat and square. Both pieces should still be right sides together!
Measure from the bottom up approximately 1 1/4" and draw a line with a pencil or fabric pen. Do this on both pieces.

Geesh, how to explain this in writing! OK, take the bag and pull the sides apart and diagonally so that the lines you drew meet up forming another line. You can also 'feel' the seams meeting up if that helps.
Pin if desired.
 |
| New line made! |

 |
| Looks sorta funny, huh? |
However wide you want the strap, you will cut the fabric width multiplied by 4. For this bag, I cut my fabric 4 x 18". If you want a 2" wide finished strap, cut your fabric 8 x 18".
Fold the fabric in half wrong sides together, and press.


Lay the batting along the center pressed line. Fold outer flaps into center and then fold together again.
 |
| Batting is at center press line and first raw edge folded over. Take the right raw edge into center press line, then fold in half again. It's a strap sandwich! |
**This is where my machine starting acting all goofy and I started
Trim ends.
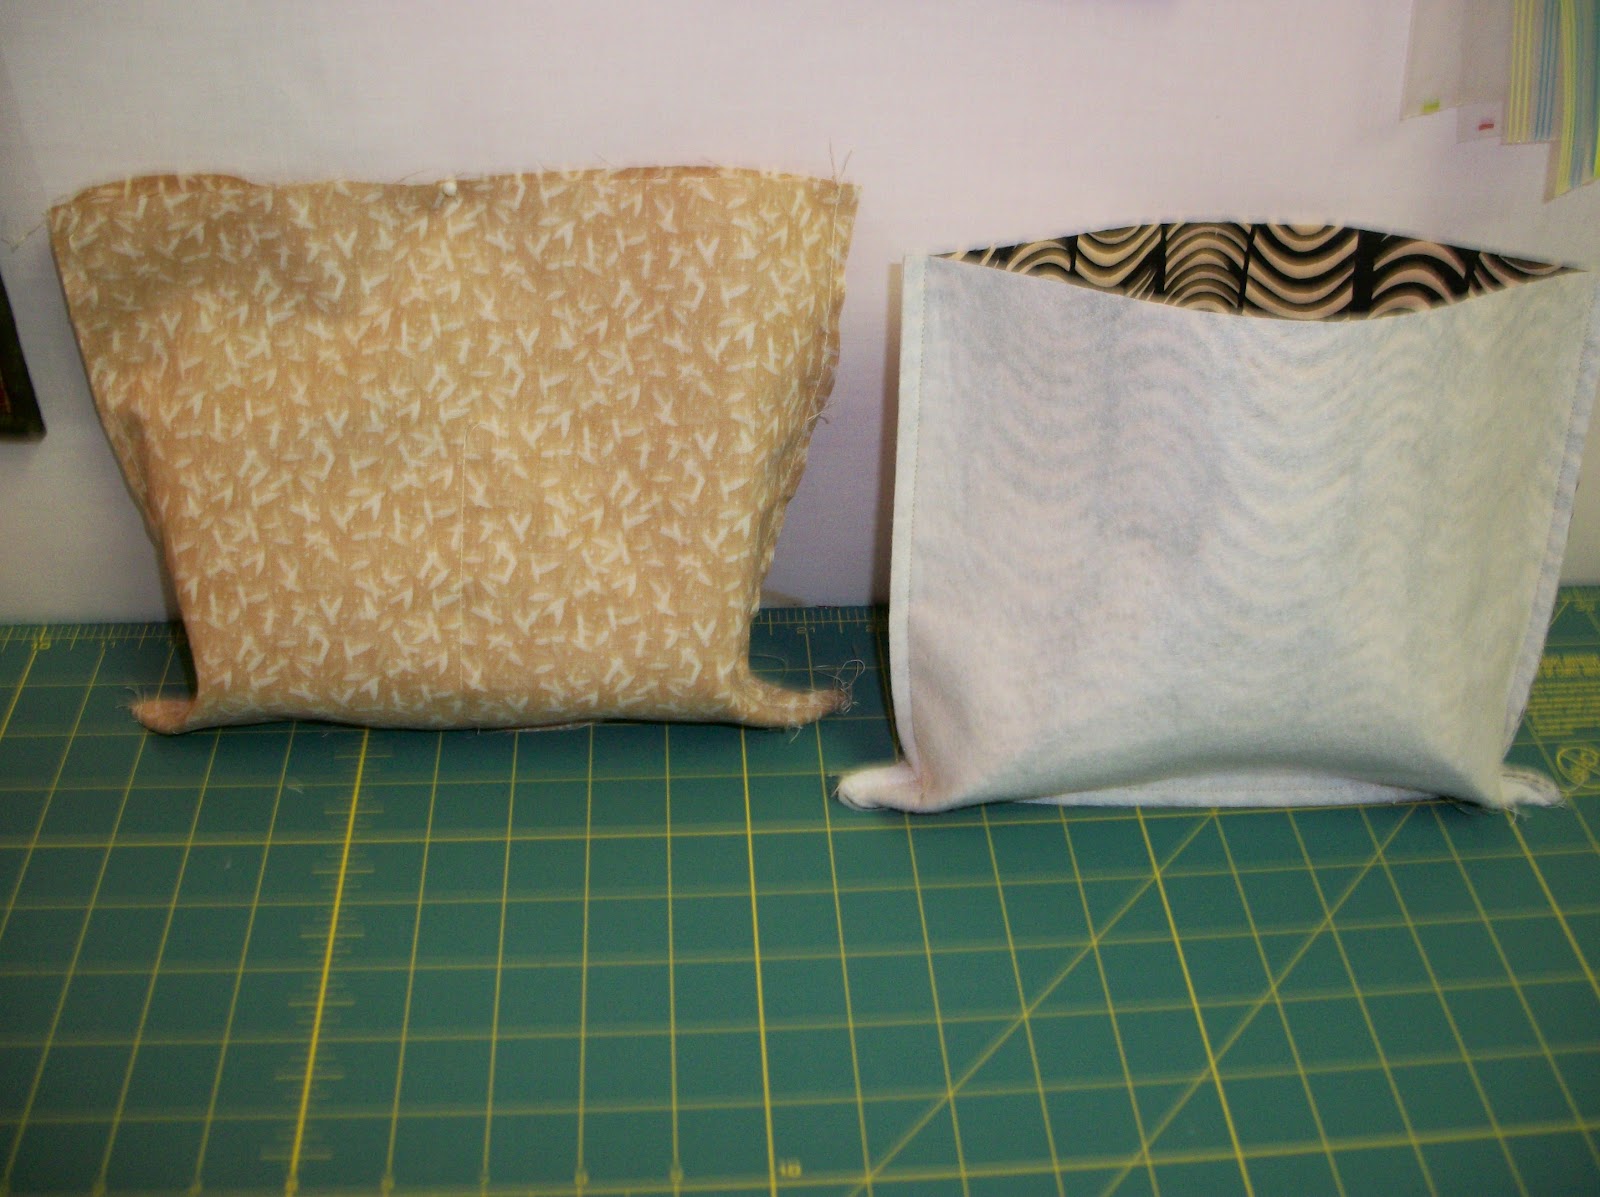
Flip outer purse right side out. (Yeah! You are finally getting there!)
Line one end of the strap centered on the outer purse seam and even with the top of the purse.
Baste stitch in place.

Carefully line up the other end of the strap in the same manner on the other side of the bag.
BE CAREFUL not to twist the strap!!!
Baste stitch in place.


Make sure the strap is inside as well!
Line up the inner and outer seams. Make sure you are evenly lined up at the top all the way around.
Pin in place all the way around.
 |
| It should look like this! |
Let your machine help you out here if you have AccuFeed or a Walking Foot...even better!
When you get to the side seams, you may have to give it a tug from behind to help it get over the thick parts.
If you can take the neck of your machine off, great! Then you can place the bag 'under' your machine and work it around. My machine neck is too big for small projects, so I have to do it from the topside.

When you have gone completely around and hopefully match up the seam allowance at the beginning, take a few extra stitches past your starting point. Just a few...not thirty!
Now I actually had a video of what to do next, but Blogger wouldn't take it yet again!! So I will do my best to describe what to do.
Remove all pins!
Put your hand in the GAP that we left open in the lining earlier.
Gently pull the outer bag and strap through the gap.
STOP!
First we have to sew the gap together! You may want to press the seams in if desired to make it easier and straight.
Sew the gap shut with a few reverse stitches at the start and stop and as close to the edge as you can yet still catching the folds.

Time for 'Finishing Touches'
I like to get it all pushed down and then press the top.
Pin around the top again.
Top stitch all the way around in same manner as before.

Optional 'Touches'
You can add a simple Velcro closure sewn in place on both sides with clear thread.
I also like to sew with clear thread about 1" or so down the side seams of the purse to help keep the lining in place and avoid it from slipping around.
Voila!
You just sewed your First Purse!


I would love to hear how your trial goes! Start off with some cheap fabric and just play with it!
A special BIG THANK YOU to my MIL, Jan -who taught me how to make these as well as so many other fun things! She always knows when my "Eyes Glaze Over" and I just don't get something, has an over abundance of patience with me and is always willing to share her knowledge and love of sewing! If she would ever update her blog, Quilt...Knit...Sew...Repeat, and start posting pictures of all the awesome stuff she creates, it would knock your socks off!!!
Would you believe I almost failed HomeEc in the 7th grade? My Mom had to finish my Apron. My teacher called me a "Rummy". Guess I showed her!
And in case you were wondering...it took me longer to type this post than it did to sew the bag!

Wow!! It is beautiful!! Thank you so much for the step by step tutorial! I love that purse. I am going to try to make one. It should only take a few months and many prototypes. Now if I could be a real pain in the a**, I notice you have fancy sewing helpers. What would you recommend someone should have to start sewing. I see a rotary cutter and that board with measurements and you mention Clear thread?? Never heard of that. Christmas is coming and what should I put on the Santa list that I would need for sewing? And what type of thread do you use for a purse. I imagine it would need to be strong. This would be much easier if you lived closer, damn this big Country.
ReplyDeleteFabulous post!!!! And now that you have mentioned my blog, I guess it's unacceptable that I haven't posted in over a month. My bad! You and Jen put me to shame! And thank you for the kudos...you are a teacher's dream. No BEGINNER quilter could do a post like this. Therefore I now consider you ADVANCED!!
ReplyDeleteJane, that's like opening Pandora's Box! Whew! I will work on a list and suggestions for you and if my MIL cleans up her area like she says she is going to, I will even hit her up and do a post for you!
ReplyDeleteJan, how about we settle on "Intermediate"? I have a long way to go!!!
Thank you so much! I can knit and felt some pretty decent bags, but sewing is such a mystery to me! My mom is a WHIZ at it and you'd never know I'm her daughter LOL. Actually, I have the sewing machine and quite a few "accessories" I've accumulated but I think just haven't spent the time sitting down and DOING it! This gives me motivation, love the pictures in the tutorial, makes it SEEM easy anyways LOL!
ReplyDeleteFantastic tutorial! I well know just how long it must have taken you to write it out and, of course, include the indispensable pictures.
ReplyDeleteI used to make custom orders and shop samples for a quilt shop. The owner would often give me some new fabric and ask me to make a quilt showcasing the fabric. And oh yeah, she'd say, write out directions for the quilt because people will want to make one just like it. It took me 'bout ten times as long to write out the directions as to make the quilt. I quickly found out I HATED writing patterns. (Did I state that too strongly?)
Anyway, thanks for going to all the trouble of writing it all out for us.
Erin, I betcha you could do it! Especially if your mom is around to lend a hand! I vote that you go for it!!! Double Dog Dare.
ReplyDeleteMamaPea, I can NOT imagine going to that much detail with a quilt pattern! It's no wonder it made you hate it! My MIL had an Etsy shop for a long time, but people always wanted 'custom' orders and I think, like you...it sorta took the fun out of it for her!
So other than Facebook, which I don't have, how do I see your showcase????? I'd love to oooh and ahhh all over them!
Well, (she says hanging her head in shame) I do have a quilting blog (www.mamapeashandmadebaby quilts.blogspot.com) but I haven't made a post since last April. (Oh, I am so bad.) I simply didn't have time this summer. (Heck, I wasn't even near my quilt studio all summer.) But now I'm starting to sneak short periods in there and need to start posting again. My daughter was giving me a hard time yesterday saying I should get back at it, but I told her I was afraid it would put too much pressure on me right now because I still have so much to do outside before the bad weather sets in. But I DO really wanna get back to my quilt blog. I do, I do, I DO!
ReplyDeleteHoly man! I'm not going to pretend that I read the entire thing... sorry, I just didn't. Remember, the sewing machine images give me anxiety!?!?! But, I am SO amazed at the detail of your tutorial for other sewers!!! How awesome!!!
ReplyDeleteI also read your deer post... Thanks for the warning about the pics! While I'm not against it and will eat it... I don't love it and I will never do it. Glad you guys like it!? HAHA!